§ How-To
When to Replace Your Edger Blade — Signs, Sizing, and Install
Dull edger blades tear instead of cut. Learn how to spot wear, choose the right size, and swap it out in minutes.
Published · Last updated:
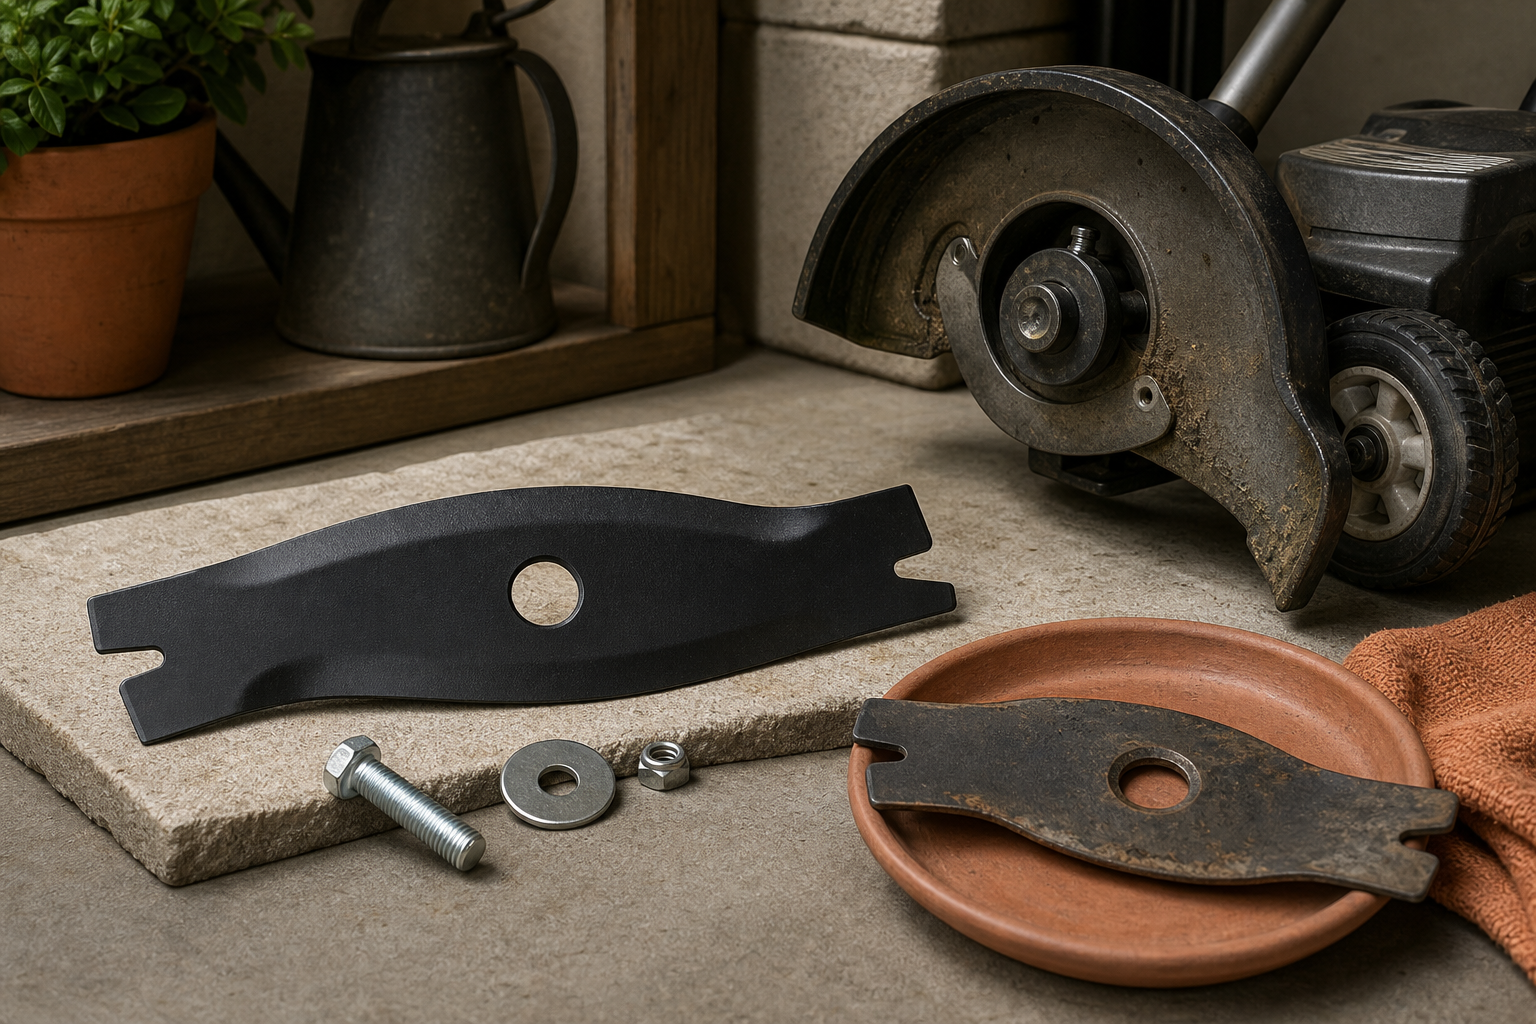
This is one of those maintenance questions that catches a lot of owners by surprise. An edger can keep working well enough that blade wear happens gradually, and before long you’re looking at ragged lines, extra vibration, or a tool that just doesn’t cut like it used to. This question comes up often in online communities and owner forums: How do I know when the blade is really done? Can I flip it over? Do I need the exact same size?
The short answer is yes—edger blades are wear items, and replacing them at the right time makes a noticeable difference in performance, cut quality, and strain on the machine. The good news is that blade replacement is usually straightforward, and compatible replacement parts are available on this site for many popular models.
Why edger blades wear out and how to tell when it’s time
An edger blade works in a harsh environment. It’s constantly striking soil, sand, roots, gravel, and concrete edges. Even when you’re using the tool correctly, the blade slowly loses material every time it cuts. That wear changes more than just sharpness.
Here’s what’s really happening as a blade ages:
- The cutting edge rounds off A fresh blade bites into turf and soil cleanly. A worn blade starts pushing and tearing more than cutting.
- The blade diameter gets smaller This is a big one. As the blade wears down, your edger cuts shallower, and the guard-to-ground relationship changes. Owners often notice they have to make multiple passes or lower the head more aggressively.
- The blade can become uneven Hitting hard objects can nick one section more than another. That creates imbalance, which leads to vibration.
- The metal can weaken If the blade is badly thinned, cracked, or bent, it’s no longer just a performance issue—it’s a safety issue.
Common signs it’s time to replace the blade:
- The edger leaves a fuzzy or ragged edge instead of a clean trench
- You need more force to get into the soil
- The tool vibrates more than it used to
- The blade is visibly rounded over, chipped, bent, or much smaller than new
- The edger struggles even though the motor is running normally
- You notice inconsistent cutting depth along the edge
A lot of owners don’t realize how worn their blade has gotten until they compare it to a new one. That’s another reason this topic shows up so often in owner forums.
How to diagnose blade condition before you buy parts
Before ordering a replacement, take a minute to confirm the blade is the problem and not just a setup issue.
1. Inspect the blade visually
Remove the battery or disconnect the spark plug first, depending on whether you have a battery, corded, or gas unit. Then look for:
- Rounded cutting edge
- Deep chips or missing sections
- Bent blade
- Cracks near the center hole or outer edge
- Noticeable reduction in diameter
If you see cracks or bending, replace the blade immediately. Don’t try to keep using it.
2. Check cut quality in actual use
If the edger is still running but the results are poor, watch how it behaves:
- Does it bounce instead of tracking steadily?
- Does it smear dirt and tear grass rather than slicing a clean line?
- Does it need repeated passes in areas it used to handle easily?
Those are classic signs of a blade that’s no longer cutting efficiently.
3. Rule out other causes
Not every bad edge is caused by the blade alone. Check:
- Depth setting: If set too shallow, even a good blade won’t define the edge well.
- Technique: Moving too fast can make any blade seem dull.
- Guard buildup: Packed debris around the guard can interfere with cutting.
- Shaft or gearbox issues: Excess play or unusual noise may indicate another problem.
If the machine runs smoothly and the only symptom is poor edging performance, the blade is usually the first thing to replace.
4. Confirm the correct blade size and fitment
Sizing matters. You should match:
- Blade diameter
- Blade thickness
- Center hole/arbor size
- Mounting style
- Tool/model compatibility
Don’t assume “close enough” is good enough. A blade that’s too large may interfere with the guard or overload the tool. Too small and you’ll lose cutting depth and performance. Too thick or thin can affect clamping and operation.
The safest approach is to look up the exact compatible part for your model. Compatible replacement parts are available on this site, which makes it easier to match the right blade without guessing.
The fix: replace the blade the right way
Once the blade shows significant wear or damage, replacement is the correct fix. Flipping the blade over is a common question, but in most cases it is not the right solution unless the manufacturer specifically designs that blade to be reversible.
Why flipping usually isn’t recommended:
- Most edger blades wear on both faces and at the cutting edge
- The blade may have a specific profile, bevel, or directional design
- A flipped worn blade is still a worn blade—you’re not restoring diameter or edge geometry
- Reusing a heavily thinned blade can increase breakage risk
If your owner’s manual does not say the blade is reversible, treat it as a one-way wear part and replace it.
Basic replacement steps
Always follow your model’s manual, but the general process is:
- Power down safely
- Remove the battery, unplug the unit, or disconnect the spark plug.
- Stabilize the edger
- Lay it on a bench or flat surface where the head is easy to access.
- Lock the blade if your model has a shaft lock
- Some units include a locking hole or pin.
- Remove the retaining hardware
- Use the correct wrench or socket.
- Pay attention to washer order and blade orientation.
- Remove the old blade
- Inspect the spindle, flange, and washers for wear or damage.
- Install the new blade
- Make sure the center hole seats properly.
- Reinstall hardware in the correct order.
- Tighten to specification
- Snug is not the same as correct. Follow the manual if torque is provided.
- Test carefully
- Spin the blade by hand first to verify clearance, then run the tool briefly and check for wobble or vibration.
If the new blade still wobbles, stop and recheck mounting hardware, blade orientation, and whether the flanges are seated correctly.
Watch: Video walkthrough
If you want a visual example of the process, this walkthrough is a helpful reference:
Even if your edger is a different brand, the video helps show the general blade-change workflow and the kind of hardware arrangement you’ll usually find.
Prevention tips to get more life from your next blade
Edger blades are consumables, but a few habits can make them last longer and keep your machine cutting better between replacements.
Avoid unnecessary hard contact
Try not to drive the blade into concrete, brick, large stones, or exposed metal edging. Light contact along the edge is normal, but repeated hard strikes speed up wear dramatically.
Edge before overgrowth gets severe
A lightly maintained edge is much easier on the blade than trying to reclaim an overgrown border all at once.
Use proper depth
Running deeper than necessary increases resistance and blade wear. Set the tool just deep enough to maintain a clean edge.
Clean after use
Packed wet soil and debris can hold moisture against the blade and mounting hardware. A quick cleanup helps reduce corrosion and makes future service easier.
Inspect regularly
Don’t wait for total failure. Check blade condition every few uses, especially during peak growing season. Catching wear early helps you replace on schedule rather than after performance drops badly.
Keep a spare on hand
Because blade wear tends to sneak up on people, many owners keep a spare ready. If your edge quality matters, this is one of the smarter maintenance items to stock.
And if you’re unsure which replacement fits, using model-based lookup for compatible replacement parts on this site is the easiest way to avoid ordering the wrong blade.
FAQ
Can I sharpen an edger blade instead of replacing it?
Sometimes lightly worn blades can be touched up, but once the blade has lost significant diameter, is unevenly worn, chipped, bent, or cracked, replacement is the better and safer choice. Sharpening does not restore lost size.
Can I flip my edger blade over and keep using it?
Only if the manufacturer specifically says the blade is reversible. Most blades are not meant to be flipped as a substitute for replacement, and a worn blade won’t regain proper performance just by turning it over.
How do I know I’m buying the right replacement blade?
Match the blade to your exact model and confirm diameter, thickness, arbor hole, and mounting style. The simplest approach is to use compatible replacement parts listed for your machine on this site so you get the correct fit without trial and error.

Find the right part on Amazon
Check price, stock and fitment — ships direct from Amazon.
§ Catalog
Shop the catalog