§ How-To
Ryobi S430 Trimmer Head — 4-Cycle Replacement That Stops the Wobble
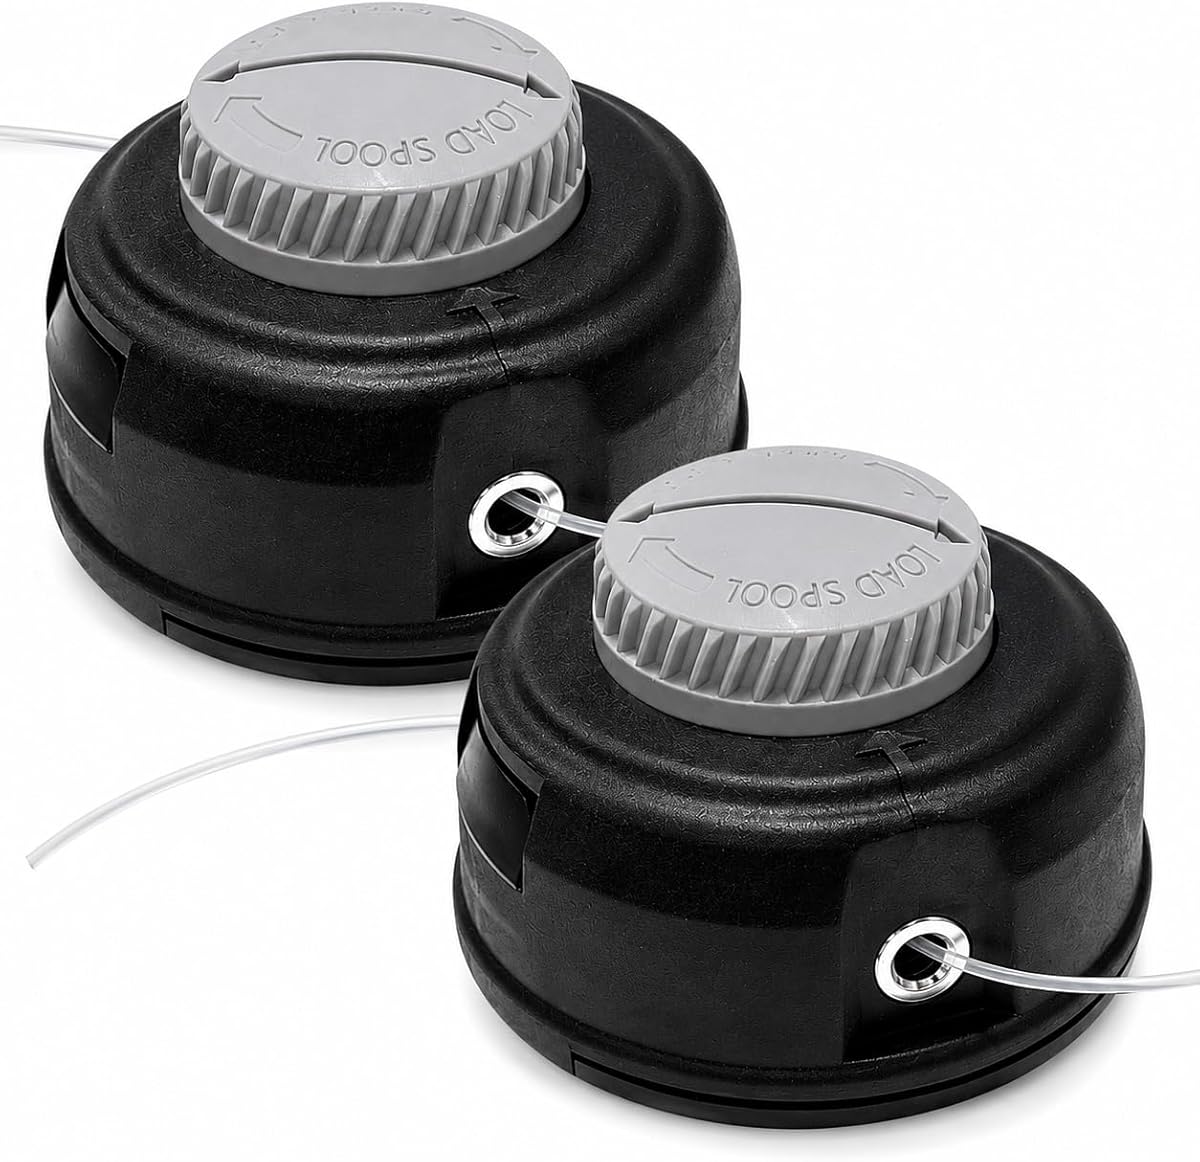
2-pack trimmer head 313318001 for Ryobi S430/RY34440/RY4CSS ($26.99). The S430 4-cycle head develops wobble and loses bump-feed function. This direct-fit replac
Published · Last updated:
If you own a Ryobi straight-shaft trimmer, there’s a good chance you’ve seen the same complaint come up again and again in owner forums and community discussions: the factory trimmer head starts wobbling, the bump-feed stops working correctly, or the spool housing gets sloppy enough that trimming becomes more frustrating than productive. It’s especially common on the Ryobi S430 4-cycle platform and related models, where the head takes regular impacts, heat, vibration, and line-feed wear.
A worn trimmer head doesn’t always fail all at once. More often, it gradually becomes unreliable: the line won’t advance cleanly, the spool binds, the head vibrates at speed, or the outer housing develops enough play that the entire unit feels unbalanced. When that happens, replacing the full head assembly is usually the simplest fix.
The Problem
On the Ryobi S430, RY34440, and similar straight-shaft models, the trimmer head is a wear item. Even if the engine or motor still runs well, the cutting head can become the weak point long before the machine is otherwise ready for retirement.
The most common failure modes include:
-
Wobble at operating speed
As the head wears, the internal fit between the spool, housing, and mounting point can loosen. That creates vibration and a noticeable side-to-side wobble. Aside from being annoying, that wobble can make edging less precise and increase stress on the shaft. -
Loss of bump-feed function
This is probably the biggest complaint. The head may stop feeding line when bumped, or it may feed inconsistently. In some cases, the spool binds internally; in others, the spring or housing wear prevents proper movement. -
Line jams and uneven feed
If the inner reel is worn, warped, or damaged, line can tangle more easily. That leads to repeated stop-and-start trimming sessions just to open the head and reset line. -
Cracked or fatigued outer housing
Repeated contact with hard surfaces, UV exposure, and vibration can wear down the outer shell. Once the housing is compromised, the whole assembly becomes less stable. -
General vibration and rough operation
Even if the line still feeds, a worn head often feels rougher in use. If your trimmer suddenly feels less smooth but the shaft and engine seem fine, the head is a likely culprit.
For many owners, replacing individual internal pieces isn’t worth the trouble. A direct-fit replacement head that includes both the inner reel and outer housing is often the most cost-effective way to restore normal operation.
Our Pick
The product worth considering here is the:
2PC Trimmer Replacement 313318001 Head for Ryobi S430 4 Cycle RY34440 RY4CSS RY4CSSVNM/EXPAND-IT Straight Shaft trimmer RYSST44 RY40ST01 RY15523A/ SS30 RY253SS/40V RY40250 RY40270 RY40290 Gas-Trimmer
- ASIN: B0FXG4RRSF
- Price: $26.99
- Pack size: 2 heads
- Rating: 3.1
- Part number: 313318001
What makes this product stand out is simple: it offers two complete replacement heads for under $27, which is a strong value if your current head is already wobbling or no longer bump-feeding properly. Since this is a direct-fit 313318001-style replacement, it targets exactly the kind of issue owners run into on the S430 family and several related Ryobi trimmers.
Why it’s a good value
- Two-pack pricing means your cost per head is very low.
- Complete head assemblies are usually more useful than trying to salvage a badly worn original.
- Includes inner reel and outer housing, so you’re not just replacing one half of the problem.
- Good option for owners who want a spare on the shelf, especially if they maintain more than one compatible Ryobi trimmer.
That said, it’s important to be honest about the tradeoff: the 3.1 rating suggests buyer experiences are mixed. This is not the kind of listing you buy expecting premium OEM-level refinement. Instead, it’s a budget-minded replacement aimed at restoring function at a low cost. If your goal is maximum value and you’re comfortable with aftermarket parts, it makes sense. If you insist on the absolute highest confidence in fit and finish, OEM may still appeal more—if you can find it and justify the price.
Compatibility
This replacement is marketed for a broad range of Ryobi trimmers and attachment-capable units using the 313318001 head style. The listing specifically calls out compatibility with:
- Ryobi S430
- Ryobi RY34440
- Ryobi RY4CSS
- Ryobi RY4CSSVNM
- Ryobi Expand-It straight shaft trimmer platforms
- Ryobi RYSST44
- Ryobi RY40ST01
- Ryobi RY15523A
- Ryobi SS30
- Ryobi RY253SS
- Ryobi RY40250
- Ryobi RY40270
- Ryobi RY40290
That is a wide spread of gas, 4-cycle, attachment-capable, and 40V models, which is convenient—but it also means you should verify fit before ordering.
Best practice before buying
Check:
- Your current head’s part number or molded reference
- Your trimmer’s model number on the data tag
- The mounting style and thread direction
- Whether your unit uses the 313318001 head assembly
This is especially important because Ryobi has used different head styles across similar-looking trimmers. Even within straight-shaft models, mounting details can vary by generation.
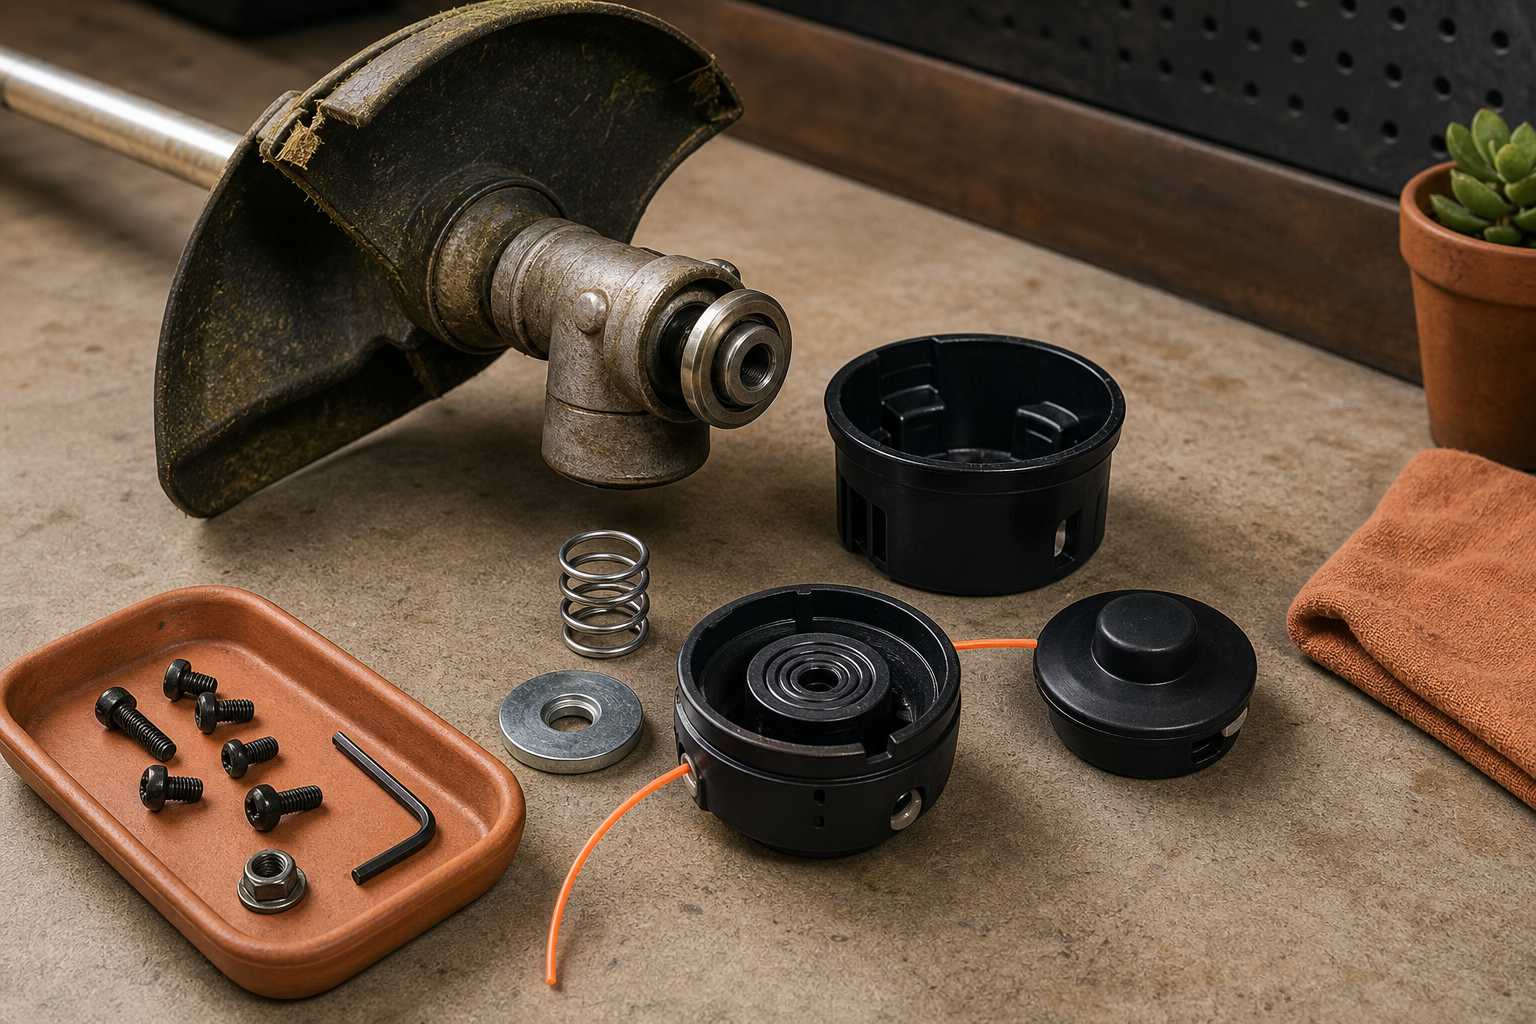
Installation Tips
Replacing a trimmer head is usually straightforward, but there are a few gotchas.
Basic install process
-
Disconnect power
- Remove the spark plug wire on gas models.
- Remove the battery on cordless models.
-
Lock the shaft or gearbox
- Many trimmers have a locking hole where you insert a pin or screwdriver to keep the shaft from rotating.
-
Remove the old head
- Pay attention to thread direction. Some trimmer heads use reverse threads, so don’t force it the wrong way.
-
Compare old and new parts
- Check height, diameter, arbor/mounting interface, and spool design before fully installing.
-
Install the replacement head
- Thread it on carefully by hand first to avoid cross-threading.
- Tighten snugly, but don’t overtighten.
-
Load line if needed and test bump-feed
- Spin by hand first to confirm the head runs true.
Common gotchas
- Wrong thread direction is probably the most common install mistake.
- If your old head failed with heavy wobble, inspect the shaft end and mounting hardware too. A new head won’t fix damage upstream.
- If the trimmer still vibrates after replacement, look for a bent shaft, worn adapter, or debris trapped behind the head.
Watch: Video Guide
If you want a visual walkthrough before swapping the head, embed your preferred YouTube install or head-replacement guide here:
<iframe width="560" height="315" src="YOUTUBE_EMBED_URL_HERE" title="Ryobi Trimmer Head Replacement Guide" frameborder="0" allowfullscreen></iframe>If you send the actual YouTube link, I can format the exact embed code for you.
Why This Over OEM?
For many owners, the main reason is price.
A genuine OEM Ryobi head assembly can be significantly more expensive than this listing on a per-unit basis, assuming you can find the exact part in stock. Availability is often the hidden issue with older or less common trimmer variants—especially 4-cycle and attachment-capable models that are no longer front-and-center in retail channels.
Aftermarket advantages
- Lower cost
- Two heads included
- Easier to justify for an older machine
- Good choice when you just need to restore line feed and eliminate wobble
OEM advantages
- Usually more consistent fit and finish
- Better odds of exact material match
- Often stronger buyer confidence
So why choose this one?
Because for $26.99, you’re effectively getting a low-cost, direct-fit solution for a very common wear issue. If your S430 or RY34440 is still running well but the head has become unreliable, spending modestly on a 2-pack makes practical sense. Even if one head ends up being your long-term fix and the second is a backup, the value proposition is still solid.
The honest caveat is the 3.1-star rating. That means you should go in with realistic expectations: this appears to be a budget aftermarket replacement, not a guaranteed upgrade over OEM quality. But for many owners, especially on older trimmers, “good enough and affordable” beats paying more for a machine that may already have years of wear elsewhere.
FAQ
Is this a full head replacement or just a spool?
It’s a complete replacement head assembly style, including the inner reel and outer housing, which is more useful when your original head is wobbling or the bump-feed mechanism is worn.
Will this fix wobble on my Ryobi S430?
If the wobble is coming from a worn or damaged trimmer head, yes, this type of replacement is exactly what you’d try first. But if the shaft, gearbox, adapter, or mounting hardware is bent or worn, a new head alone may not solve it.
Does it fit all Ryobi straight-shaft trimmers?
No. Even though the listing includes many models—such as S430, RY34440, RY4CSS, RYSST44, RY40ST01, RY253SS, RY40250, RY40270, and RY40290—you should still verify that your machine uses the 313318001 head style before ordering.
If you want, I can also turn this into a more polished affiliate-style article with a stronger buyer’s guide tone and cleaner embed formatting once you provide the YouTube URL.

Find the right part on Amazon
Check price, stock and fitment — ships direct from Amazon.
§ Catalog
Shop the catalog