§ Journal · May 28, 2026
DeWalt: DeWalt Circular Saw Blade Installation, Removal, Replacement
Step-by-step guide for DeWalt owners — with video walkthrough.
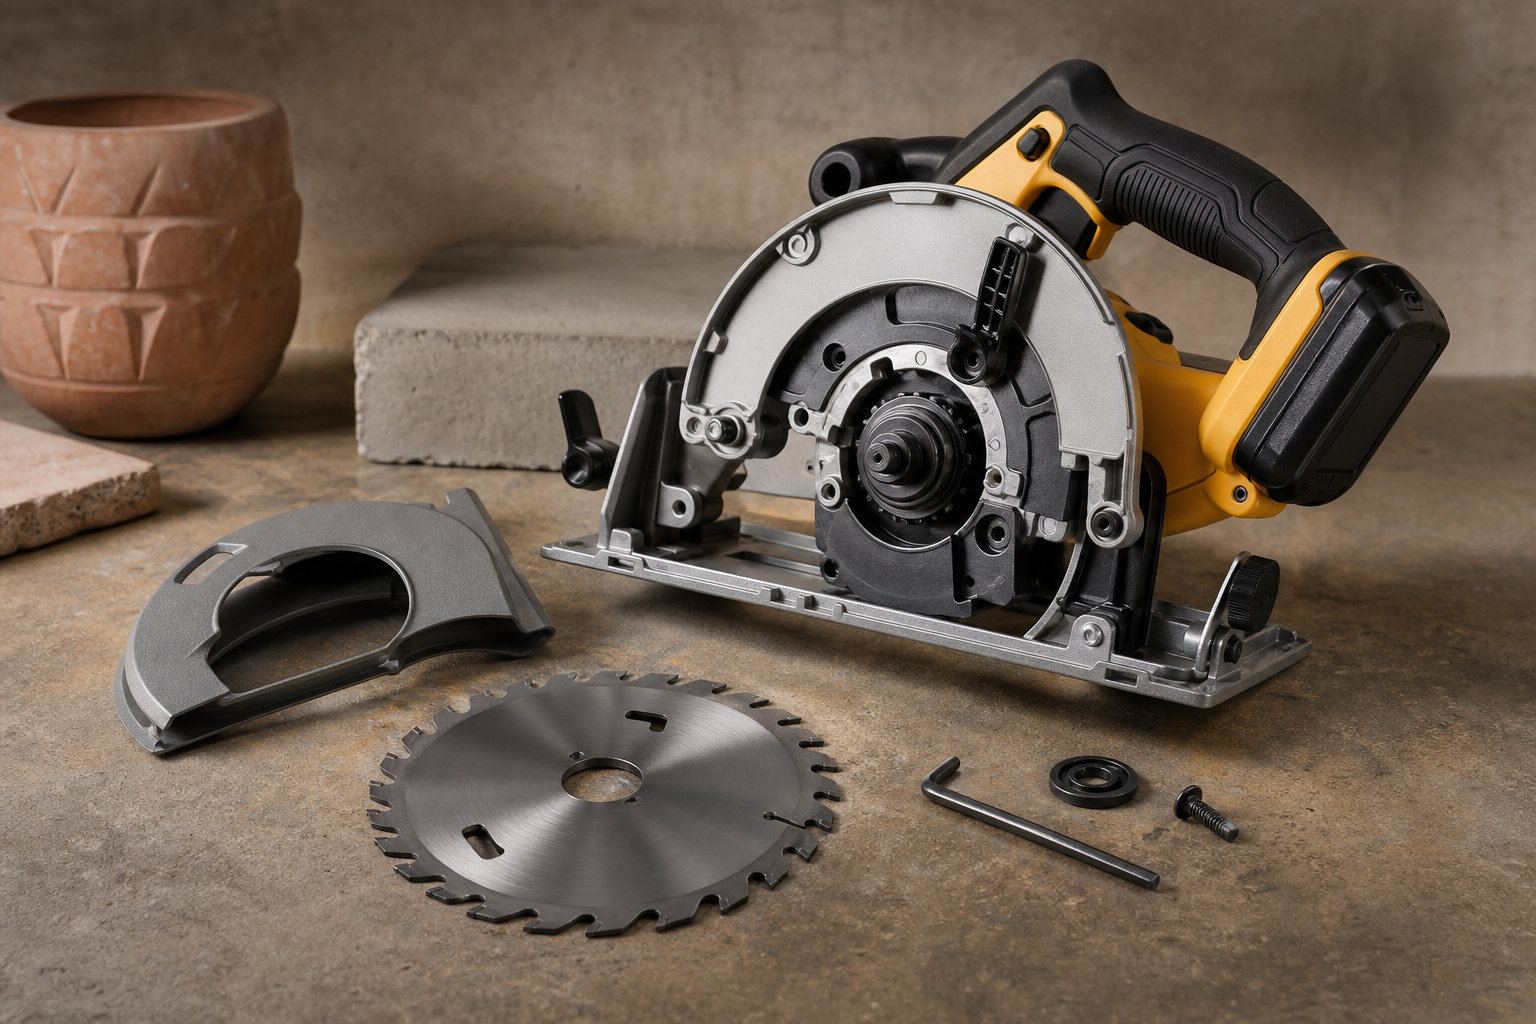
A sharp, properly installed blade makes a DeWalt circular saw safer, easier to control, and far more accurate. If your saw is burning wood, wandering off the line, or leaving rough edges, it may be time to remove and replace the blade. The good news is that blade changes on most DeWalt circular saws are straightforward once you know the right order of steps. Below, we’ll walk through safe blade removal and installation, what to check before you tighten everything back down, and a few common mistakes to avoid. If you need a compatible replacement blade, blade bolt, flange, or guard-related part, you can find matching parts on our site.
Tools and parts you’ll need
Before you start, gather everything so the job goes smoothly:
- Compatible replacement circular saw blade
- Blade wrench that came with your DeWalt saw, or the correct replacement wrench
- Work gloves for handling sharp blades
- Safety glasses
- Clean rag or shop towel
- Small brush or compressed air for sawdust cleanup
- Optional: light-duty cleaner for pitch buildup on flanges and guard area
A few fitment notes matter here:
- Match the blade diameter required by your specific DeWalt saw, such as 6-1/2 inch, 7-1/4 inch, or another listed size.
- Match the arbor size exactly.
- Make sure the blade is rated for at least the RPM of the saw.
- Choose the right blade style for the material: framing, finish cuts, plywood, fiber cement, metal-cutting, or other specialty applications.
If you’re unsure which replacement blade or hardware fits your model, our site offers compatible parts and replacement options to help you order with confidence.
Prepare the saw for safe blade removal
Start with the most important rule: disconnect power completely.
For a corded DeWalt circular saw, unplug it from the outlet. For a cordless model, remove the battery pack before your hands go anywhere near the blade. Never rely on the trigger lock alone.
Next, move the saw onto a stable work surface with good lighting. If the blade has just been used, give it time to cool down. Freshly cut metal, treated lumber, or dense hardwood can leave the blade surprisingly hot.
Now inspect the guard and blade area:
- Retract the lower blade guard carefully and look for packed sawdust or pitch buildup.
- Check that the lower guard moves freely and snaps back into place.
- Look at the blade for missing teeth, cracks, heavy burning, or warping.
- Identify the arbor bolt and blade lock button or spindle lock on your DeWalt saw.
Most DeWalt circular saws use a spindle lock to keep the arbor from turning while you loosen the blade bolt. Pressing that lock while rotating the blade by hand will usually let it click into place.
Before loosening anything, it helps to note the current blade orientation. The directional arrow printed on the blade should match the saw’s direction of rotation. If you install the new blade backward, cutting performance will be poor and unsafe.
Remove the old DeWalt circular saw blade
With the battery removed or the cord unplugged, you can remove the old blade.
-
Engage the spindle lock.
Press and hold the spindle lock button. Rotate the blade slowly by hand until the arbor locks fully. -
Loosen the arbor bolt.
Use the blade wrench to turn the bolt in the correct direction for your saw. Many circular saws use a reverse-thread-style setup that confuses first-time users, so pay attention to the directional arrow near the blade bolt or in your owner’s manual. Force it the wrong way and you can overtighten it. -
Remove the outer flange and bolt.
Once loose, set the bolt and outer flange aside in a clean spot. Keep them in order so reassembly is easier. -
Retract the lower guard.
Pull the lower guard back carefully to expose enough of the blade for removal. -
Slide the old blade off the arbor.
Handle it by the center and outer body, not the teeth. Even a dull blade can cut skin easily.
This is a good time to clean the mounting area. Wipe off the inner and outer flanges, remove compacted sawdust, and check for resin or pitch that could keep the new blade from seating flat. A dirty flange can cause wobble, vibration, and inaccurate cuts.
Also inspect the blade bolt threads. If they’re damaged, stripped, or unusually worn, replace the hardware before using the saw again. Compatible replacement bolts, washers, flanges, and other DeWalt saw parts are available on our site.
Install the new blade correctly
Installing the new blade is simple, but orientation and seating matter.
-
Confirm the blade specs.
Double-check diameter, arbor hole size, tooth count, and RPM rating before installation. -
Match the rotation direction.
Look for the arrow on the new blade and compare it to the rotation arrow on the blade guard or saw housing. They must match. -
Place the blade on the arbor.
Retract the lower guard and slide the blade into position. Make sure it sits fully against the inner flange. -
Reinstall the outer flange and arbor bolt.
Thread the bolt in by hand first. This helps prevent cross-threading. -
Lock the spindle and tighten the bolt.
Engage the spindle lock again and tighten the arbor bolt securely with the wrench. It should be snug and firm, but there is no need to over-muscle it. Over-tightening can damage components or make the next blade change unnecessarily difficult. -
Release and test the lower guard.
Let the guard return to its normal position and confirm it closes smoothly over the blade.
After installation, spin the blade by hand—carefully and with the saw still disconnected from power—to make sure it turns freely without rubbing the guard or wobbling on the arbor.
Test operation and check cut quality
Once the blade is installed, reconnect power or reinstall the battery. Before making a full cut, do a quick functional check.
- Hold the saw securely and briefly run it unloaded.
- Listen for unusual vibration, scraping, or rattling.
- Watch for excessive blade wobble.
- Confirm the guard returns properly after movement.
If anything sounds off, stop immediately and recheck blade orientation, flange placement, and bolt tightness.
For your first test cut, use a scrap piece of wood that matches your usual material. Let the blade reach full speed before entering the cut. A properly installed blade should cut smoothly without extra force. If the saw still struggles, the issue may be the wrong blade type, a worn motor, damaged flanges, or a guard alignment problem.
A few common blade-change mistakes to avoid:
- Installing the blade backward
- Using the wrong arbor size
- Forgetting to remove the battery before service
- Tightening the bolt before the blade is fully seated
- Reusing damaged flanges or bolts
- Using a blade not rated for the saw’s speed
Routine blade inspection is just as important as replacement. If you switch between rough framing, finish carpentry, and sheet goods, keeping the right blade on hand improves both safety and results. Our site carries compatible replacement blades and circular saw parts to help keep your DeWalt saw cutting the way it should.
Watch the video
If you’d like a visual walkthrough, watch the embedded DeWalt blade installation and removal video below:
Use the video alongside the steps above to compare guard movement, spindle lock use, and blade positioning on the saw.
FAQ
How do I know if my DeWalt circular saw blade needs replacement?
Signs include burn marks on wood, slower cutting, chipped edges, extra tear-out, wandering cuts, or visible missing teeth. If the blade is cracked or warped, replace it immediately.
Can I use any 7-1/4 inch blade on my DeWalt saw?
Not always. The diameter must match, but so must the arbor size and RPM rating. You also want the right tooth count and blade style for the material you’re cutting.
Why is my saw vibrating after I changed the blade?
Vibration usually points to an incorrectly seated blade, dirty flanges, loose hardware, wrong blade size, or a bent blade. Disconnect power and inspect the installation before using the saw again.
§ Catalog
Shop the catalog